CRM custom fields in Salesgem: how to add them and why they matter
CRM custom fields let you capture lead information that the standard fields miss. In Salesgem, the default fields cover the name, phone number, email, source, stage, and lead owner. Custom fields let you add anything else your sales process needs, like budget, preferred location, or renewal date. Here is why that matters, and how to add them.
Why CRM custom fields matter
Every business asks its leads different questions.
A real estate rep needs a buyer’s budget and preferred location. An insurance rep needs the policy type and renewal date. The standard CRM fields cover the basics, but not these details.
When the CRM cannot hold that information, it scatters. Some sits in spreadsheets. Other lives in WhatsApp chats. Some stays in a rep’s head. Follow up gets weaker, and context gets lost.
Custom fields fix this. They keep business specific details on the lead record, so your team has full context before every follow up. In practice, that helps in three ways:
- Reps understand a lead before the first call
- Managers can read the pipeline without chasing for details
- Lead information stays in one place, not across scattered notes
What is a custom field in Salesgem?
A custom field is an extra field you create to store information that is specific to your business.
Standard fields capture the basics: name, phone number, email, source, stage, and lead owner. Custom fields capture everything else that matters to your sales process. You choose the field name and the type of information it holds.
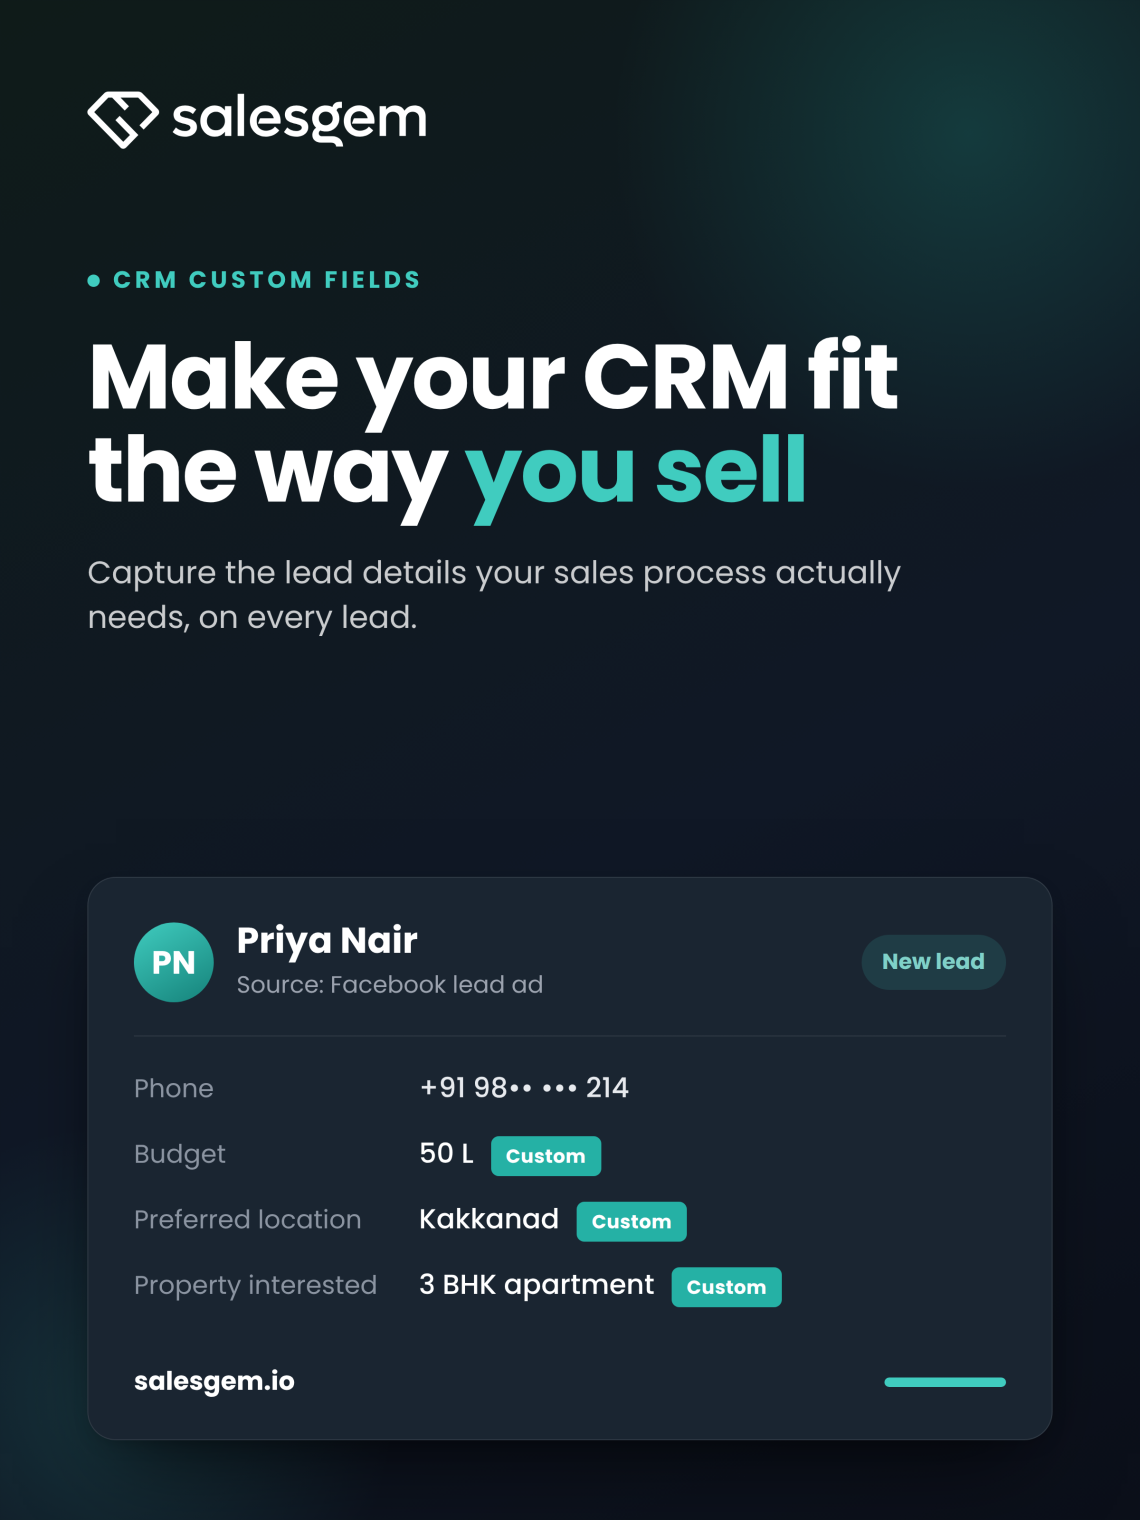
For example, a real estate company might add Property Interested, Budget, Preferred Location, and Number of Bedrooms. Those details are not in the standard fields, so they work well as custom fields.
How to add a custom field in Salesgem
You can create a custom field from your account settings in a few steps.
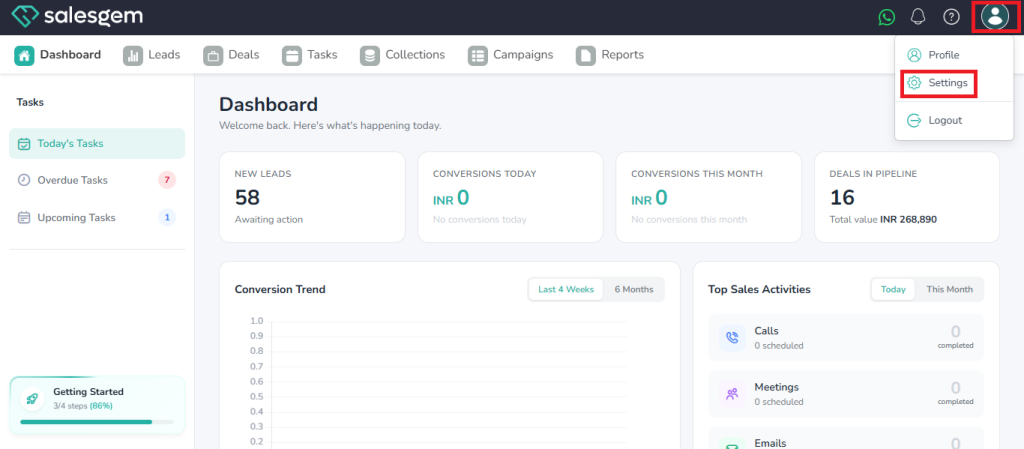
1. Click Settings under your profile icon.
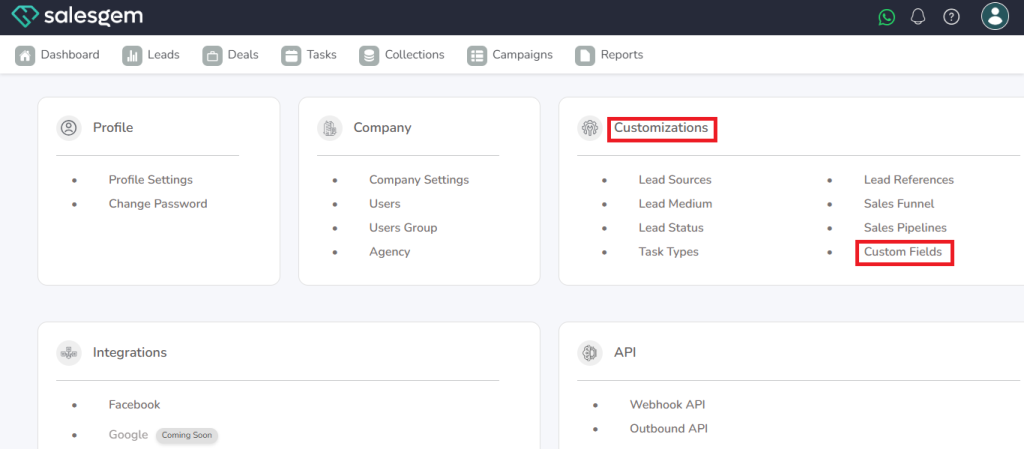
2. Choose Custom Field under Customizations.
3. Click New custom field.
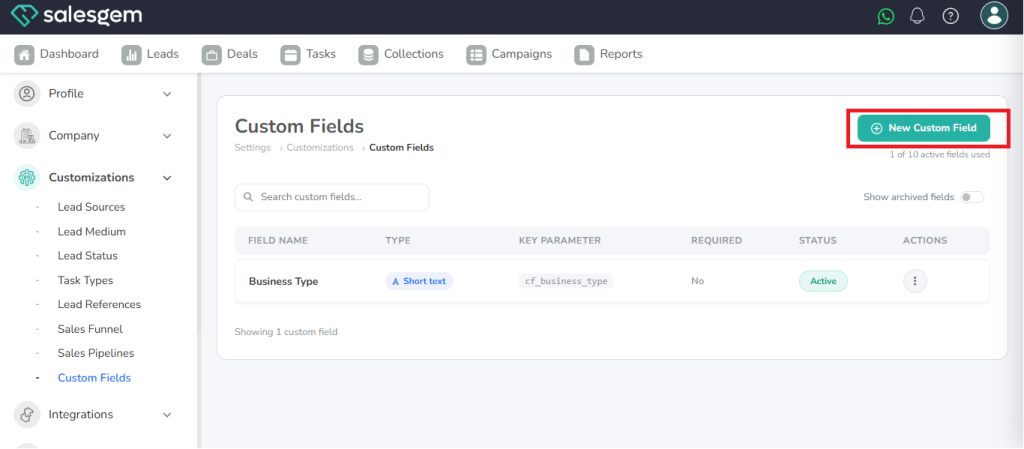
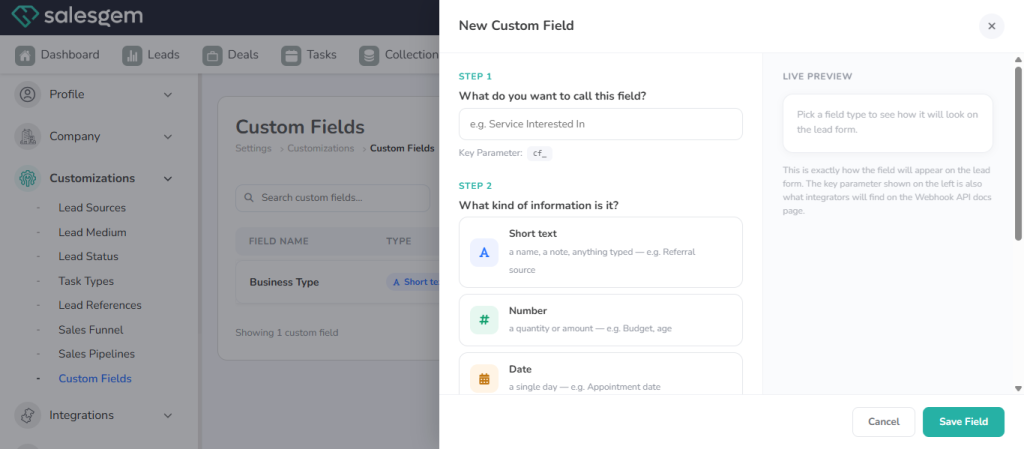
4. Enter the field name, then choose the type of information the field will hold.
5 lick Save field.
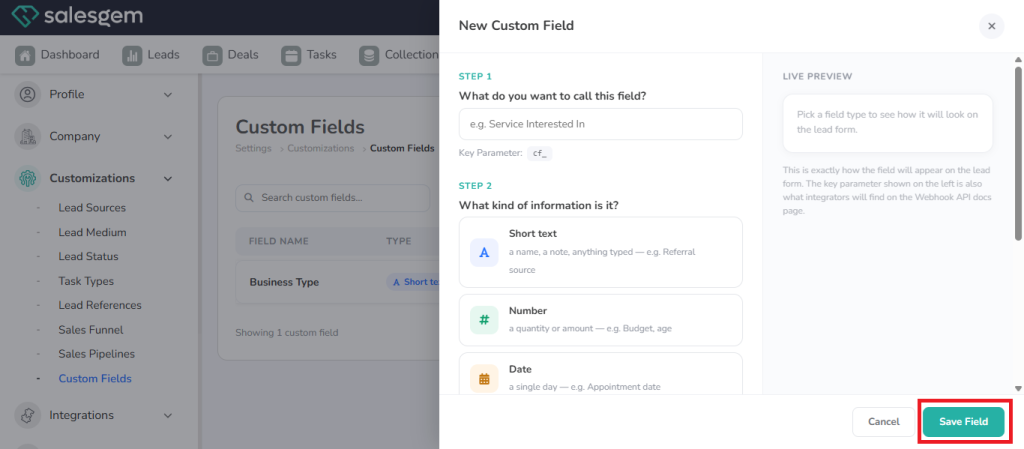
That is it. The new field is ready to use on your leads right away.
Where your custom fields appear
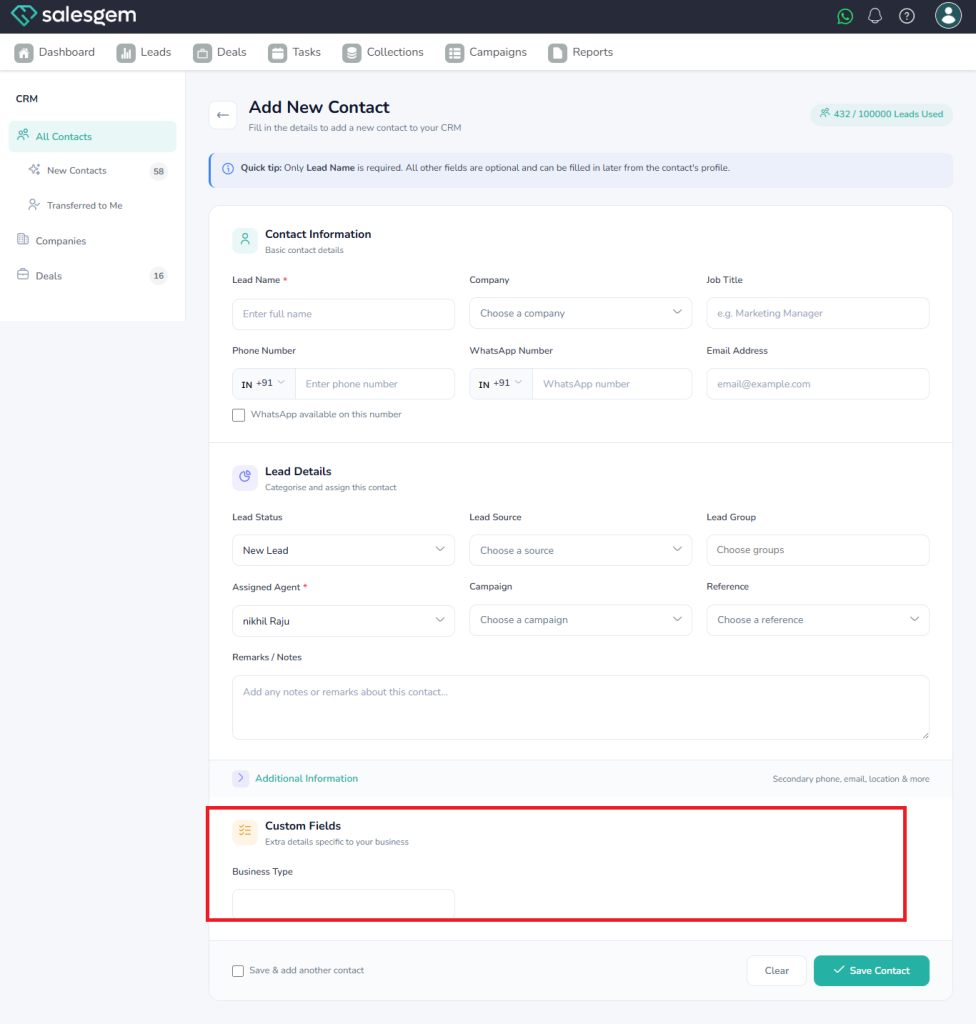
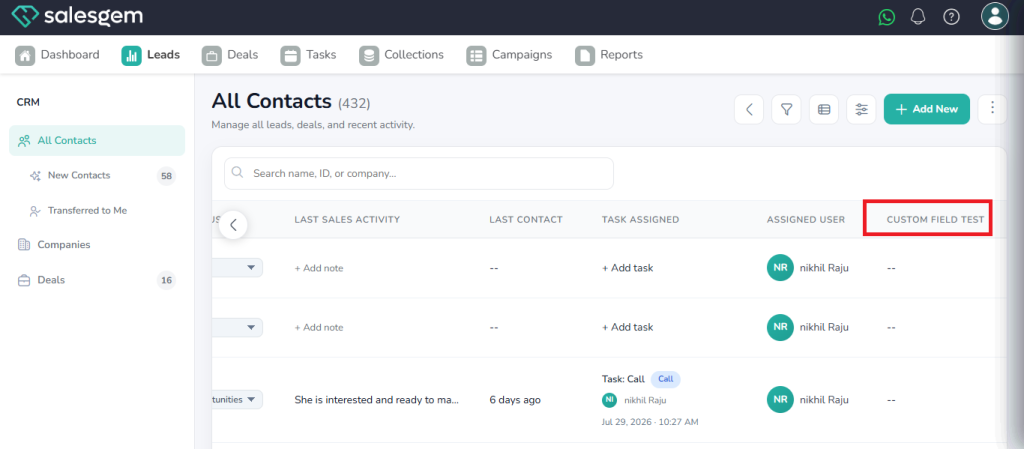
Once you save a custom field, it shows up in three places in Salesgem:
- The profile details page, so reps see it on the full lead record
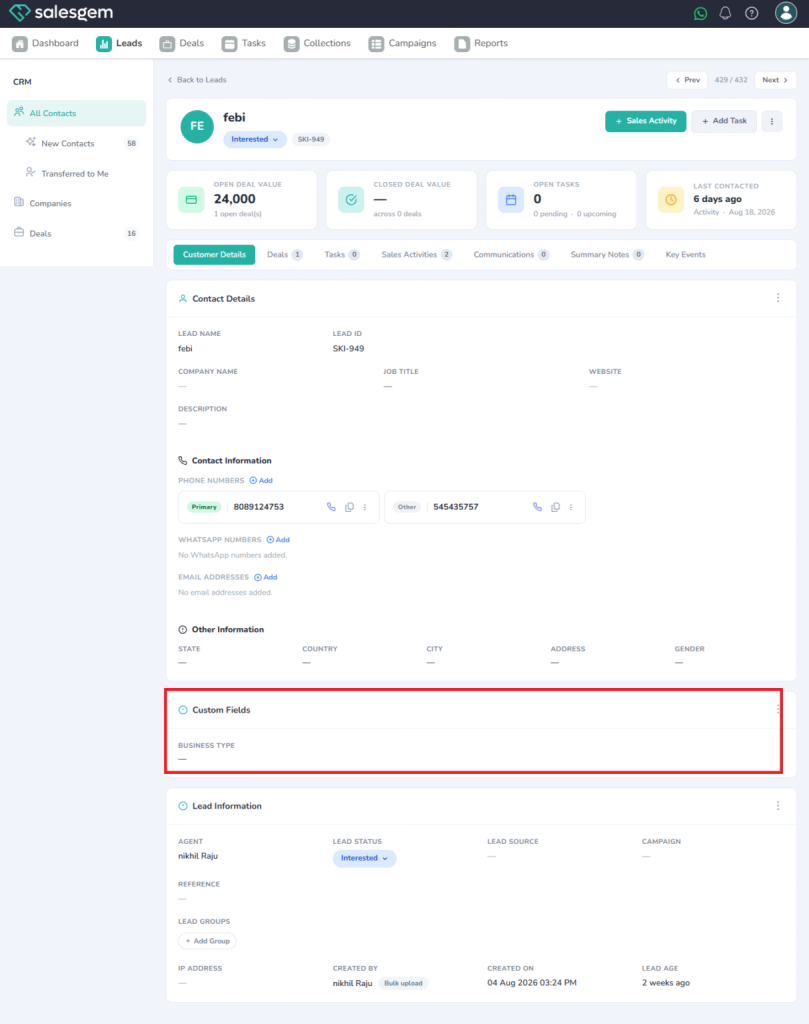
2. The new lead page, so the information is captured from the start
3. The lead list page, so you can scan it across your pipeline
You will know it worked when the field appears on a lead’s profile and on the new lead form.
Custom field examples for different businesses
The right fields depend on how you sell. A few examples:
- Real estate: property interested, budget, preferred location, number of bedrooms
- Insurance: insurance type, coverage amount, renewal date
- Education: course interested in, qualification, preferred batch
- Travel: destination, travel dates, number of travelers
- Clinics: treatment of interest, preferred date, enquiry source
In each case, the rep opens the lead already knowing what the customer wants. That is the real value of capturing the right lead information.
Make your CRM fit the way you sell
Your CRM should match your sales process, not force you to change it.
Custom fields close the gap between a standard CRM and the way your business actually sells. They keep the right details on every lead, so follow up stays organized and specific.
Set up the fields your team needs and start capturing better lead information.
Sign up at salesgem.io/signup to get set up.
No credit card needed · 14-day free trial · Free support and migration
Frequently asked questions
CRM custom fields are extra fields you create to capture lead information beyond the standard name, phone, and email. In Salesgem, the default fields also include source, stage, and lead owner. Custom fields let you add anything else your sales process needs, such as budget or renewal date, so every lead record fits how your business sells.
To add a custom field in Salesgem, click Settings under your profile icon, choose Custom Field under Customizations, then click New custom field. Enter the field name, choose the type of information it holds, and click Save field. The new field then appears on your lead profile, new lead page, and lead list.
Custom fields appear in three places in Salesgem: the profile details page, the new lead page, and the lead list page. This means reps capture the information when a lead is created, see it on the full lead record, and can scan it across the pipeline without opening every lead.
An example of a custom field is Budget or Preferred Location for a real estate lead, a renewal date for an insurance lead, or a course of interest for an education lead. Each one stores information the standard fields do not, so the sales team can prioritize and personalize follow up.